Crochet Cupcake

We have a whole raft of birthdays in the family at this time of year. My sister and my dad share a birthday, and theirs is today!! Happy birthday Dad, happy birthday little sister. In addition, my not-brother-in-law and my niece have birthdays in the next couple of days too so there’s lots of celebrating.

My sister is working abroad so I couldn’t bake her a cake this year – so instead I sent her this:
crochet cupcake

I made it from this pattern which was featured on craftzine, it was really quick to make! I just sewed the seed beads on as a little after thought, they look so cute though :)

Crochet Tutorial: The Slip Knot

I often get asked what “crochet” is … well, you can read about it on wikipedia, but actually its really easy … so I’ll teach you :)

Here’s the first task, all you need is a bit of yarn, or string, or anything really.

Part 2 coming soon …

Bubble Wrap Camera Case

I’ve made a new case for the camera, using bubble wrap as padding. The inside is microfibre cloth (note to self: don’t ever use this again, its too fluffy for words and frays much too easily!) and the outside is crochet with a button fastener.

I started by making the inner microfibre liner with bubble wrap around it:

inner pocket

I then made the crochet outer, using some gorgeous dark turquoise wool I bought in Germany last year and which has been waiting for a project just like this one! Its quite fluffy but that doesn’t matter as the bag is lined. I added a button to close it, a carabiner to hang it from, and a place to hook the tripod onto if we are taking that too. Here’s the finished product – it looks a bit strange because its empty, since I was using the camera to take the photo!

crochet and bubble wrap camera case

(there are a few more photos on flickr )

Circuitboard Cake

There’s a birthday in my household this week so I have been making a surprise cake, which I do every year. Apart from the year where all our stuff was in storage and I only had fairy cake tins, where I made surprise fairy cakes instead! This year I went slightly overboard and created a circuitboard cake! In fact it was an astable multivibrator circuit, in case you’re interested – see http://www.play-hookey.com/digital/experiments/rtl_astable.html.

First I made the cake, and dyed a whole load of white roll-out icing green. I also dyed myself green which you would think would give away my secret mission but happily he is less observant than I feared. Then I iced the cake – this was my first mistake because I forgot to put something over the cake to make the roll-out icing stick! Usually either watered-down icing or jam is good.

sponge cake iced sponge cake

I had a whole stack of packets of sweets to use to create the components from. I needed transistors (round liquorice with a flat bit sliced out of them), LEDs (jelly dolly mixtures), capacitors (round dolly mixtures), and resistors. The resistors were easily as complicated as the whole of the rest of the components put together and next time I will just buy as many colours of write-on icing as I need to do the stripes! In the event I made the stripes out of various things wrapped round marshmallows, including red laces, the offcuts of the green icing, bits of liquorice chopped really small, and (for the orange and brown) coloured bits of dolly mixture, separated from the white bits of sweet, mashed together, rolled out, and then cut into strips.

raw materials edible components

So, here’s the finished article (and a closeup of a couple of the components)

completed cake

edible component closeup

Home-Sewn Cushions

I have a little sewing machine and a newly-decorated living room. So what could be more obvious than making new cushions for my sofa? I’m planning a whole set but here are the first two:

Two new cushions

The one on the left is my personal favourite, it is felt flowers just cut out and then stitched onto the cushion with embroidery floss and running stitch. The other is the first one I did, with lovely turquoise beads sewn on and then stitching around them. Here are a couple of close-ups:

bead cushion close up flower cushion close up

The first cushion has an interesting overlap on its back, where my spatial awareness failed me when trying to sew layered overlapping things together inside out. The second time, I pinned the first seam while the cushion was the right way out, so I could be sure which way it would end up!

A Turtle and a Giant Baby Blanket

I’ve just finished another slowpoke, like one I made earlier, and this one is at least as cute!

slow poke in the sun slow poke

I realised after finishing this one that they original pattern has them with their heads looking sideways, maybe this is why mine always look a bit strange!! This one also doesn’t have a tail … when I came to assemble him, I hadn’t made one and somehow it just never happened.

My next project is a square (or maybe more than one, who knows?) for the Oxfam Baby Blanket campaign. The plan is for loads of squares to be knitted and joined together into one large blanket which they display places to campaign on the state of maternal mortality in the world. Then they’ll turn the squares into lots of baby blankets to be sent to places where they will be useful. I think its a great cause, this is how I’m doing so far:

charity square start

If anyone else is knitting for this then add a comment!

Fetching Fingerless Mitts (again)

Last year I made these lovely fingerless mittens from a pattern called “fetching” on the knitty.com site.

I’ve made some more! After a trip to Farfield Mill in September I bought one skein of lovely local-made wool. I adapted the fetching pattern, adding extra cable repeats at the cuff, elongating the middle section of the glove, and replacing the thumb with a vertical slit which is achieved by knitting the circular knitting straight for 8 rows just before the final cables. Here’s the result:

And a little closeup on the cables, as I’m very proud of how these gloves have turned out (apart from the interesting ‘S’ shape I achieved when I did one of the cables in the wrong direction and didn’t realise until I was almost finished the glove! We call that “a feature”)

Crochet Robot

I recently met up with an IRC friend, Davey Shafik, in real life for the first time. A couple of days beforehand I realised that he lives in Florida and sometimes meets up with my good friend and phpwomen.org mentor, Ligaya Turmelle. This seemed like too good an opportunity to miss to send her something little, so I made her this (and finally it reached her so I can post about it! This was actually made at Christmas time):

He’s just crocheted, nothing complicated, and I made him up although I’ve seen plenty like him doing the rounds on craftzine and similar sites. I know I’ll get asked to make another so instead, here’s the pattern and if you can’t crochet, I’ll teach you. He’s a really easy toy and was quick to make. Lig says “he’s cute” which is all the encouragement I need :)

Robot Crochet Pattern

materials: 3.5 mm crochet hook, DK (8 ply) yarn scraps, black embroidery thread, tapestry needle, toy stuffing.

N.B. These are British Crochet instructions, if you know what “single crochet” is then you need to convert it to American format, see my previous post on the differences, basically this is all “dc” which is “sc” in American terminology.

Foundation: 24 ch.

Round 1:1 ch (counts as dc), dc in remaining back loops to end, turn, crochet along the other loops (they were the front loops, then you turned the work, so they are kind of back loops now) back to start, join.

Round 2: 1 ch (counts as dc), dc all round, join.

Rounds 3-18: as row 2.

Finish Body: This is where we seam across the top of the round to make the shoulders, so hold front and back of body together and do 8 dc across both front and back stitches, as if using crochet technique to join pieces. Then crochet across the middle part, where his neck would go, then crochet closed 8 stitches at the end of the row too, going through front and back stitches together as before, finish off yarn. You should have a big square shape with a smaller slit on the top edge.

Cast on Head: With other colour of yarn, crochet a row of dc around the slit, (this is the basis of the head) join.

Rows 1-8: 1 ch (counts as dc), dc all round, join.

Now stuff the robot with the toy stuffing, as tightly as possible.

Finish Head: (Similar to method for shoulders) Fold flat and crochet two stitches together across top of head, finish off yarn. Weave in all ends.

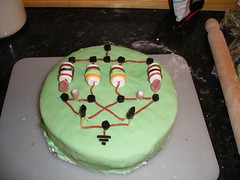
Aerial: ch 8, finish off. Using yarn ends, stitch first ch to 3rd or 4th one in chain and join other end of aerial to middle of top of head (see picture).

Feet (make 2): 3ch, join to form ring. ch 1 (counds as dc), 5 dc into ring, join. 4 more rows of 6dc, and stuff the shape (its fiddly!). Then leave a long end, thread through remaining stitches and pull tight. ch 12 with long end and finish off. Attach to robot with yarn end.

Hands (make 2): make a little pom pom (I just sounds yarn round my fingers a few times and tied it round the middle with one end of a long tail of yarn, then cut through the loops). ch 18 with the long tail, finish off, and attach to robot.

Face: using black embroidery thread, embroider a face.

Pattern Notes

This is my first ever attempt at publishing a pattern, although I often make things by just beginning and then working in the right direction rather than finding a pattern. If you make him, I would really like to hear from you and if you have photos too then that would make me actually dance with joy :) Similarly if its unclear or you spot any mistakes then please add a comment – feedback is welcome!

Christmas Angel

Merry Christmas everyone!!

I spent last weekend doing a mad delivery round across the midlands but now I’m enjoying a quiet Christmas at home. I also finally got round to making the angel for the top of the tree, here she is:

She took up her post on top of the tree just in time, on Christmas Eve!