Charlie Bag from Burdastyle

About a year ago I discovered the BurdaStyle site – where they have open source patterns. And then over the summer I saw an event organised in NYC where they were making these Charlie Bags – foldable fabric bags for putting shopping in. The pattern is free, and came as a PDF. You print the PDF, and then you cut and stick to make the paper pattern – the bag is bigger than A4.

Once I’d made the pattern, I cut out the bag and followed the instructions. They have good instructions, step by step with pictures. The Charlie bag is really simple so you just zig-zag round the shape and leave the handles like that, just unfinished, which is about the only way someone with my sewing abilities is going to make anything with curvy handles :)

I’m really pleased with the result:

Charlie Bag

This was pretty simple and now I’ve assembled the paper pattern, I might make a few more :)

Cobweb Wrap

After around 15 months of ongoing work, I’ve finally finished my cobweb wrap which I initially started (original blog post here, complete with links to yarn sources) to make a good travel project. Well it was certainly that – small and lightweight, I took it on three transatlantic trips all told and am now so attached to it that I’m not sure when I’ll wear it!

For once I (loosely) followed a pattern to make something, which is pretty unusual for me. Another unusual feature of this project is that it is actually for me, I mostly make things for other people, not sure why! The pattern is the “Beaded Cobweb Wrap” from Erika Knight’s Essential Crochet, I have a few of her books and love them. This was a brilliant project, it was tiny to pack and with a 6mm hook it grew despite having rows as long as I am tall! Here’s a couple of pictures of the finished product (thanks Kevin for photographing me):

And to show off the beads:

Stash-Busting Striped Ripple Crochet Baby Blanket

For a few month I’ve been working on a handmade blanket for a baby expected by a couple of my friends – and I’ve finally been to visit and deliver it so here’s some details of the project. (OK so baby Ethan is about a month old and I only just made it round but, meh, life’s been busy! On the plus side, he’s big enough to be alert and kick about on his mat and look at us so that was really cute!!)

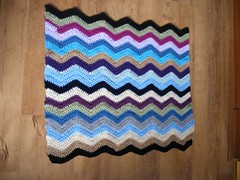
Its a basic ripple pattern, I have the 7 Day Afghans book and I reduced one of the patterns in there to baby-size with fewer repeats. It was a 6ml hook and the wool was taken entirely from my existing stash, basically it was a stripe or two of each of the DK weight wool I had lying around. So it’s colourful, and it helped make space in my life for more wool, and it was very inexpensive (i.e. free!), so on the whole the perfect project. Here’s the finished article:

Ethan's Blanket

And a close-up of those ripples:

Ethan's Blanket closeup

I’ve made a round ripple before but never a straight one, although I kept looking at patterns for them. When I heard about Deb’s pregnancy, I knew this was exactly the blanket I wanted to make! So, welcome Ethan, and good health to all the family.

Creating a Banner Bag

Often at PHP Conferences, the organisers are good enough to give PHPWomen a table, and we have a banner we use on these occasions.

PHPWomen stand

Its kind of an annoying thing to lug around with me – its about a metre high and usually travels in a cardboard tube. I’ve been all over the place with it, had to shorten the tube to get it in my suitcase for going to London this year, and then when you get to a place you still have to carry it and its awkward. So, I made a bag for it, ready for this week’s trip to DPC in Amsterdam.
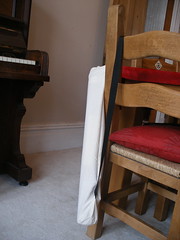
One Banner Bag

Its along the same lines as the yoga mat bags that I keep seeing patterns for – just a tube with a circle at the bottom to make it a cylinder, some webbing sewn into the seam to make a strap and a cord to pull tight at the neck, I took some pictures as I went along.

Bag Template Cord Sleeve
Bag Tube with Handle Radial Pins

First I cut out a rectangle, longer than the tube by about 4 inches and wide enough to go round (very easily round). Then I made the little pocket at the top for the cord to go through (best to do this first as otherwise you’ll probably sew it shut later – thanks mum!). Once you’ve made the pocket then you have a right side and a wrong side, this next bit is easy to get wrong so pay attention! Lay out the rectangle with the right side up. Lay the strap ends against an edge, then fold the other edge over to meet and make the seam – you should have the hem of the cord sleeve on the outside, and a tube with the strap hanging in the middle of it, now pin straps and seam and sew. I went back and forth a couple of times over where the straps were attached.

Time for some maths!

First measure across the tube with it flat. Double that number and you have the circumfrence of the shape you need for the bottom of the bag. So, divide that by 2 times pi (6.283 ish) to get the radius of the circle to cut out. Don’t forget to add seam allowance to this. I had a compass to make my circle but a piece of thread and a pencil would do in a pinch. Once you have cut out the circle, put loads of pins in facing outwards, and then sew round the outside, over the pins. Turn bag the right way out, thread cord through sleeve, and you’re done :)

I just hope it hangs together for a while, got a few conferences to get to this year!

Replacement Love-Knot Wrap

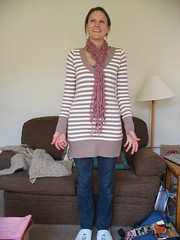
A few years ago, when my little sister turned 21, I made her a crochet love-knot wrap. She’s used it (as a warm scarf) since then but recently lost it moving between multiple different places in the French Alps while working as a nanny for a hotel chain. So I made her a new one:
Caitlin Modelling her Scarf
Its the same design as before, using a “love knot” or “Solomon’s knot” stitch to create an airy web of a wrap that can be worn either over the shoulders or bundled into a scarf as shown. I used a cotton tape yarn since she’s just about to leave again to go and work in Portugal so woolly wouldn’t be a good choice, this yarn used to be a cardigan I bought but it had daft sleeves so I unravelled them but never did anything better.

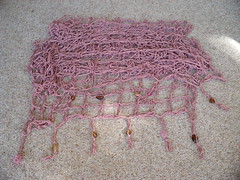
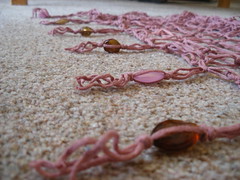
The scarf laid out and a closeup of the beads:
Scarf Scarf Closeup
Here’s hoping she hangs onto this one at least as long as she managed for the last – safe travels, little one!

Curious Combination of Craft and Code

I’m a software developer, so I like to make things. The fact that some of these things involve yarn, fabric, or wood rather than code doesn’t make any difference to how I feel about building things. For the most part my programmer friends think I’m strange for making woollen things, and my craft friends think I’m strange for working with computers!

Since spending more time online and getting to “meet” (in a virtual sense) more people, both crafters and coders, its becoming clear that I’m not alone on this one. First I saw a this thread about crafts on the phpwomen forum and then I also noticed that on ravelry (a social network for knitters. Yes, really) there’s a group for PHP knitters.

Are you a geek who also makes non-code things? Let me know :)

Home Made Yarn Swift

Some time ago I started a project, using laceweight mohair, which I blogged about. Its take 6 months to finish the first skein, which was wound into a ball by friends, and now I’m ready for the next one. I’ve been chasing around trying to find a wool winder I can borrow and also considering using a nostepinne but at 400 yards of yarn in a skein, I’d be there for some time doing that.

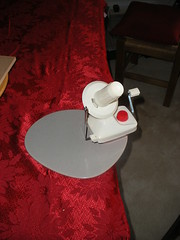
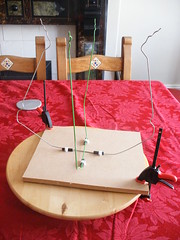
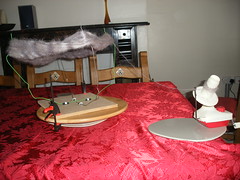
To cut a long story short, my boyfriend ordered me a surprise wool winder so I was off to a flying start – but I don’t have a swift (and I don’t plan on winding wool often enough to justify buying one as they aren’t cheap). So I googled and found this home-made swift on instructables – and decided I could make my own. Our lazy susan (5 quid from Ikea) is wooden so I didn’t really want to tape onto it, so instead I found a spare piece of MDF and clamped it to the lazy susan. With two coat hangers cable-clipped to the MDF, I was all set.

Ball Winder Yarn Swift Assembled

Making a yarn ball

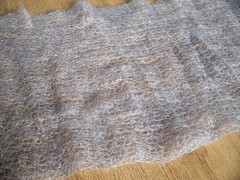
It actually worked really really well, I had the two remaining skeins wound into balls in no time at all and I can carry on with my project, which is growing, if slowly! Look, I think I’m half way there:

Cobweb Wrap

Granny’s Christmas Blanket

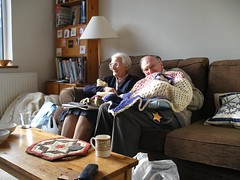
It was a long time coming but I finally finished the blanket I was making for my granny – and in time for Christmas as well (well, almost. The border didn’t get finished until Christmas Day but I didn’t see my folks til Boxing Day anyway!). She was suitably surprised and impressed, here she is with the blanket:

Granny and Blanket

Actually Grandpa looks more impressed in this photo … or maybe he was trying to hide until the blanket?

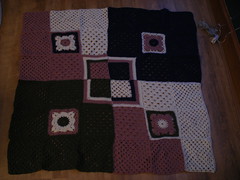
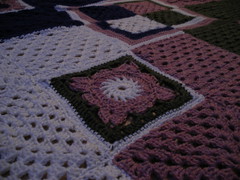
The pattern was rotationally symmetrical in terms of which pattern block went where, and the colours ran from purple in one corner to green diagonally opposite with pink and cream as accompaniments. I could have been braver with the colour placing, but, you live and learn. Here’s a photo of the blanket (without its border, I couldn’t photograph it with the border as there simply wasn’t enough floor space once Christmas hit), and a little closeup:

Blanket - Almost Done

Blanket - Closeup

The squares are all from the “200 Crochet Blocks” book – granny square, corner granny, shell lace and willow.

Christmas Preparations

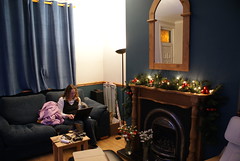
We’re hosting Christmas for family this year (actually its Kevin’s family, but that’s a technicality), and between preparations for that and having a new camera in the house, I have some nice photos. After all that we’ve done on this house, suddenly it feels like its coming together into a real home.

Xmas Living Room

The garland on the mantlepiece (the mantlepiece that I dismantled, sanded down, and restained earlier in the year) is a bit of a craft project. I’ll write a separate post at some point but suffice to say the baubles were in the discounted set that I wanted because it had snowflakes in it. They are attached to a plain garland with cable ties, and a set of lights my sister left behind added in too.

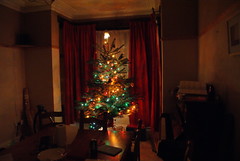
I also have a photo of the Christmas tree, I really like this photo (thanks Kevin!)

Xmas Front Room

Hanging Snowflakes Decoration

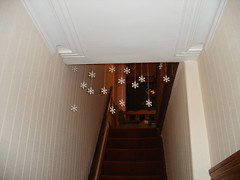
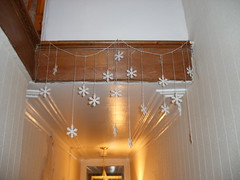
Last year in January I bought (actually my dad paid for them, thanks dad!) a whole box of Christmas decorations from IKEA, for about 2 GBP. In the box were some snowflake decorations, and yesterday I made a little hanging snowflake decoration to go over the stairs in the hall. I think it looks cute!

snowflakes

It was just a little crocheted string (to give the hanging snowflakes some texture to get tied onto so they didn’t all slide around on the string), then snowflakes threaded onto the cotton, tied into a loop, and then looped onto the string. You can’t really see in the photos but the snowflakes are all glittery and sparkly. Then we put a few nails into the wood over the stairs, and just hooked crochet stitches over them – here it is from the stairs side:

snowflakes

The whole thing took about 20 minutes … so although the snowflakes have had a long wait, it was worth it!