Homemade Kitchen Shelves

For the last … really long time … I’ve been working on a place to put the cookery books in the “new” kitchen. Since the kitchen was finished early in 2011, that’s been quite a long-running project! It’s finally finished though and I thought I’d share a bit about how I made it (not least because I get nagged about the lack of non-geeky posts on this site – you know who you are!) Continue reading

Basement Tanking Project

At one time I wrote a lot on this blog about houses, and this house in particular once we bought it 4 years ago. One major feature is that the basement kitchen floods fairly regularly, maybe 4 times a year? This is obviously not ideal however the structural work required to put it right was around 20% of the value of the house, and shortly after we bought the house the bottom dropped out of the UK property market so we couldn’t borrow against the house.

Fast forward 4 years of cooking in wellies once in a while, and running down the stairs to check the basement every time it rains a lot (in Northern England, you can imagine this gets really old really fast). Actually even when it wasn’t underwater, it was a pretty nasty kitchen, always damp and it had no heating so in winter it was whatever temperature it was outdoors. This sums it up: my mother’s old dresser, standing on bricks to keep it out of the water
Kitchen Dresser on Four Bricks

Continue reading

Garage Clearance

When we bought this house, three years ago, we also bought the contents of it, which did bring us some nice furniture but also brought a staggering amount of junk. While the house has slowly emerged from the chaos, the garage has remained basically full, including a jacuzzi bath, more furniture, filing cabinets, and who knows what else. Repeated trips to the tip seemed to be making little impact and we had some of the old bits of wood out of the house which are too big for the car. This problem has been bothering us for ages, but last week we solved it! Kevin rang up wetakeanywaste.com who are local and will sort through the contents and recycle whatever they can before disposing of the rest in a responsible way. They were friendly, efficient, and not at all expensive – within a few hours we had a totally empty garage, very impressive!

They do house clearances and were even able to take the old gas bottles out of the garage, I was happy to know they would recycle stuff, and they just brought a truck and loaded it all up themselves, I only stopped working long enough to sign the paperwork and write the cheque :)

A Three-Year Old Home

At one time I wrote about little else than the house on this blog, but these days its a pretty rare occurrence. However this weekend marks three years since we bought this place and moved in, and it does begin to feel like a home. In fact the house is a lot more than three years old, around 115 years in fact, its a old brick-built semi-detached house, red bricks and set over 4 floors as is fairly common in this part of the world (West Yorkshire).

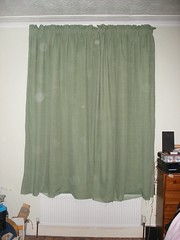
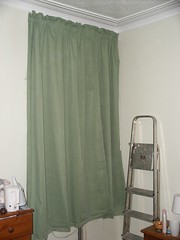
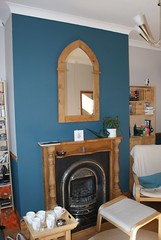
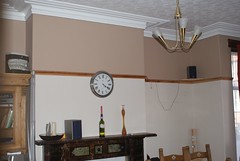
In real terms, not a whole lot has happened in the house this year. I’m not exactly sure what we did with our time but Kevin changed job twice and I’ve been pretty busy so home improvements have definitely been getting neglected! One major thing we did, which I absolutely love, is we decorated my office (scroll down to see the “after” photos!). I have spent quite an insane amount of time at this desk over the last few months, between working, writing, preparing talks, and who knows what else, so having a place that suits me so well makes that so much easier! Control over my environment and only the cat to interrupt me most of the time is my idea of a good working environment! I’ve been working from home for almost 2 and a half years, and still enjoy this as much as ever, which is good news since although Ibuildings now has an office in Sheffield, that’s still a commute that is way too crazy to do regularly.

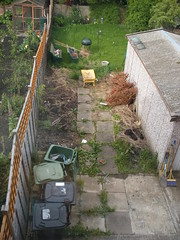
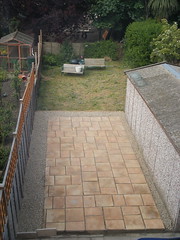
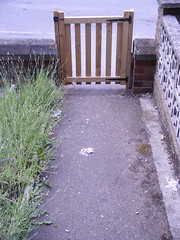
The office looks over the garden and the garden is one part of the house project which is really coming together in a way that I like. Looking at those initial photos of the space, and remembering that we just strimmed the 4-foot-high weeds down to a couple of inches for our housewarming party … it was a junk yard, really. And now, the flowerbeds I dug out last year have everything just a bit bigger and better this year, and mum has brought me lots of new plants. The climbers I planted along the edge of the nasty garage are getting the idea and growing themselves into beautiful flowery garage-hiding wallpaper (well and they’re growing across and onto everything else that gets close to them also, I had to rescue the barbecue from getting assimilated this week!) After laying the lawn about 18 months ago, and the patio last summer, we now have an apple tree growing in the lawn and some furniture for the patio … all in all its quite a suburban garden:

New Patio Furniture

For me the garden space always had the potential for this, and now I’ve got my own herb garden, annual flowering things (plus a few pretty weeds that I’m allowing to remain), and rhubarb, it really does feel like home!

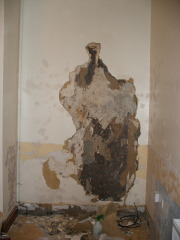
For the coming year, we’re hoping to sort out our basement/damp problems, once and for all … if we can afford it!

New Office

I haven’t posted about the house for ages, mostly because I haven’t been around enough to do much with this project at all! Some months ago (July to be precise) I moved out of the bedroom I use as an office here and into an attic, so we could redecorate the office. To cut a rather long story short, After several holes in walls and other such carrying-on, I’m finally back into my office!

We went from this (you can’t really see how nasty the grey paint was or how much the previous wallpaper pattern was showing through)
office

Surprisingly this happened:
Magnificent ? In His Flying Machine

Less surprisingly, this happened (my house is > 100 years old, brick internal walls throughout, and sometimes the plaster has got tired of hanging on!)
Hole in the Wall

Now that corner looks more like this:
New Office

And my desk is back where it should be, yay!
Office Update

Thanks to everyone who offered to help with hanging wallpaper in response to us struggling so much to make this happen – it was our first time hanging wallpaper but that wasn’t the hard part. This project stalled badly due to a combination of lack of time on my part and the sheer volume of prep needed on a house this age which has been neglected! Thankfully my parents came for lunch last weekend and pushed us in the right direction with a combination of instructions and practical help :)

The Writing on the Wall

I’m currently redecorating in the house and have moved my office up to the top floor temporarily – I like it up here but its a flight of stairs to the bathroom, two to answer the door and three to get a cup of coffee and I also have no wired network! I started stripping the wallpaper off my real office (which will be my office again once its done), and look what I found:

office What's under the wallpaper?

Can you tell what it is yet? Magnificent ? In His Flying Machine

I think this room is going to be a bit of a mission, I have one wall with half a missing skirting board which has had its fireplace plastered up twice, one where the plaster is falling off much faster than the old wallpaper, and one outside wall which is damp and in such bad shape I actually had to go outside and check it looked OK from there. And this is is the smallest room in the house …

New Bedroom Curtains

This weekend I took some time to make some curtains for the bedroom. Since we bought the house we’ve had some rather unattractive and slightly broken metal blinds. The room was otherwise OK though and we just kind of moved into it and worked on the rest of the house. I bought the fabric for the curtains soon after we moved in but I needed some help from my mum to actually make them as I wanted to do 2 layers and wasn’t sure how to proceed.

Window 1, before Window 2, before

Kevin’s mum Kath was visiting this week and while explaining to her why I couldn’t do this task myself, we kind of talked me round. Curtains are just straight lines after all so I dug out some crafty books and considered the task (thanks Kath!)

I had two layers of fabric, one plain sheeting and one floaty gauze – the idea of having floaty curtains but which do actually block the window. I measured the window and found that both were 74 inches high and were 56 and 44 inches across respectively. I do mean inches, our ceilings are 8 and a half feet high so most of our windows are taller than me! This of course makes curtains quite an undertaking, with 60 inch wide fabric and two curtains on the bigger window and one on the other, I had two 60 inch by 80 inch curtains and one 90 inch by 80 inch. By the time you have seamed edges and top, and attached curtain tape, that’s more than 30 yards of sewing and you need a LOT of floor to cut things out on. The wrestling was quite worth it though:

Finished Curtain 1 Finished Curtain 2

For reference, the curtains were quite easy to make (although they’re still unhemmed). The recipe goes something like:

  • cut fabric, lay out with right sides together
  • for the wider curtain, I joined half a width with a full width to get the size I needed
  • pin and then stitch down outer edges
  • pin and then stitch along the top
  • turn right side out (like a duvet cover!)
  • pin and then stitch corded curtain tape 5cm from top of curtain, along back
  • hang curtains
  • admire
  • Wonder how long til I get around to hemming them? My excuse is that curtains are supposed to hang for a while, to allow them to “drop” to their eventual length!

New Patio and Garden Gate

There haven’t been any house updates for a while – because I haven’t been here so haven’t done anything! However we did realise earlier this year that we were never going to find the time to lay our own patio, we’ve been in the house two years now (can I get a little “yay!” for that?) and still nowhere to sit outside, so I found a local garder who could come and do it, he even has a website so look up Character Gardens if you need a gardner. Lee and his team were friendly and the results are good!

Here’s the obligatory before and after shots:

Patio - before it began Finished Patio

They also came and fitted us a garden gate, ours has always been hopeless and it actually fell off its hinges about 3 months ago. Now I have a shiny new one with a catch that goes “click” when you close it.

Garden Gate

(and look, my lavender hedge is getting bigger!)

House Update

I haven’t blogged about the house for a while, and since we had to tidy up at the weekend for my grandparents’ visit, I thought a tidy house was a good time to take a few photos. When we first moved in, I blogged a lot about the house, and frankly it was a bit of a state! Most of the photos were along the lines of:

Its not (such) a disaster now, so I thought I’d share a few more up-to-date pictures.

Firstly: the living room. When I said I painted my living room turquoise, I wasn’t exaggerating!
Living Room Mantlepiece

Dining room: This room hasn’t had a lot done to it but we have bright red curtains and tablecloth, brings warmth to the room. The piano is in here too.
Dining Room Mantlepiece

Our Bedroom. Just realised I’m choosing all the mantlepiece pictures – that’s because in this case I love the original tiles, the mirror, and my fairy lights!
Bedroom Mantlepiece

We also redecorated the spare room (well, actually mum did all the wallpapering, but the preparation took months!)
Spare Room

There’s still a lot to do, although mostly we’ve at least plastered up some of the holes!
Landing

(more pictures on my flickr set if you are interested, I figured this was enough for one post)

Next up: we’ve got plans for a patio :) I think I’m starting to realise that a house project is never really finished …

Christmas Preparations

We’re hosting Christmas for family this year (actually its Kevin’s family, but that’s a technicality), and between preparations for that and having a new camera in the house, I have some nice photos. After all that we’ve done on this house, suddenly it feels like its coming together into a real home.

Xmas Living Room

The garland on the mantlepiece (the mantlepiece that I dismantled, sanded down, and restained earlier in the year) is a bit of a craft project. I’ll write a separate post at some point but suffice to say the baubles were in the discounted set that I wanted because it had snowflakes in it. They are attached to a plain garland with cable ties, and a set of lights my sister left behind added in too.

I also have a photo of the Christmas tree, I really like this photo (thanks Kevin!)

Xmas Front Room